Sunday, April 26, 2015

Lemming Lacquer - Curiosities From Wonderland Review!

Hello all! A few days later than I intended, I have the full Curiosities From Wonderland collection to review for you from Lemming Lacquer. This is Cassie's first collection and it's absolutely wonderful! She did a magnificent job covering so many different types of polishes in one collection and doing them all so well. I was especially impressed with how professional and polite she was with me when asking me to swatch, she really sold me on her commitment to professionalism and quality in her products!


A little breakdown of this collection for those of you who haven't seen my IG swatches: three jellies with glitter, one thermal jelly with glitter, one glitter topper, one holo, and one duochrome holo. Seven polishes in all, this collection was designed to encompass several different forms of Alice In Wonderland stories, video games, and movies!


First up I have two juicy coats of Ravens & Writing Desks. I decided to accent the colors of the glitter on my ring finger using Morning Dew (Stardust Polish) and stamping with my 2-03 plate from Uber Chic Beauty. On top of that I drew a couple of ravens using black acrylic paint. I reeeeally love this polish! It went on very smoothly and evenly, the glitters distributed so well, and it dried very quickly. Whenever I see polishes that have this much glitter in them, I expect the polish base to have much less pigment so that the glitters are visible when layered, but I think R&WD has just the perfect amount. You can still see the different layers of glitter and the base is still very squishy, but it was only two coats! I'm also a huge fan of this unique jungle green, I think it looks very flattering on my pale skin.


Next up is Eat Me, the glitter topper from this collection. As I've said before, this might be one of my very favorite manis that I've ever done! I'm so thrilled that it came together as I expected. I did a corner gradient over white using Gossip Mag (Trust Fund Beauty), Funny Bunny (B Squared Lacquer), Bees Knees (BSL), Sprout (BSL), Rachel (Mentality Polish), and Viola (BSL) on my pointer, middle, and pinky nails. I also used the same colors to gradient stamp on my ring finger using my Alice 03 plate from MoYou London. On top of all of my other nails, I used one coat of Eat Me! I'm so excited about this polish. I really don't own very many glitter toppers because they tend to get left out of collections and for whatever reason I just don't buy many solo. I love how versatile this is that it can create more complex manis like this, a simple accent nail, a jelly sandwich, YOU NAME IT. I was also pleased with how jam-packed it was! I was expecting to have to put at least two coats just to get all of the colors on there, but it was surprisingly easy for me to cover the whole nail and get the whole rainbow with one quick swipe.


Next up we have two squishy coats of Drink Me. It's so hard to say since I really love all of these, but I think this may be my favorite. I can't even handle it! I love polishes like this make me look super pale because they're so dark and vampy, it's one of my favorite things about polish at all! This one also holds a special place in my heart since it was designed based off of Alice: Madness Returns from American McGee which is one of my all-time favorite video games. I think Cassie captured the dark nature of that game and Alice's shrinking hiccups perfectly! As with R&WD, this one distributed very evenly and dried very quickly! This polish is everything that I was hoping that Cosmic Forces would be when I first saw it, it's dark and ominous with bright glitters and I just love it. I used an accent nail of three coats of Fabled (Illyrian Polish) stamped with Posh (Nvr Enuff Polish) and my MoYou London Alice 03 plate again.


Next up is the jelly thermal I'm Not All There Myself. Initially, I didn't even realize that this one was a thermal until Cassie reminded me and I'm so very happy that she did! I just thought that it was another gorgeous jelly, but who knew it was two gorgeous jellies in one?! I used two coats over a nude base to reduce VNL during transition, but I was surprised to see that it seemed unnecessary since it looked opaque enough without the extra effort. This polish is a bright fuchsia when warm and a deep blurple when cold - encompassing all of the lovely colors of our favorite Cheshire Cat from the 1951 Disney version of Alice In Wonderland! One of my favorite things about this polish is that the glitters match each respective shade so well that they quite literally disappear during each transition! I'll explain this a little bit better with the larger shots as that sentence was just about as confusing as the Cheshire Cat himself.

Warm
As you can see in this picture, the lighter pink circle glitters are much less visible on the nail than they are in the bottle. She did so well matching them so that they would disappear and focus more on the darker purple glitters that nearly disappear when the polish is cold! Such a great amount of thought went into balancing this polish out in each stage, and it really shows.
Cold
Now in its cold state you can see the larger pink glitters much more than in the previous shot. I just love the attention to detail in this polish! Since I forgot to mention it before, my accent nail was Trick Or Treat (B Squared Lacquer) with strips of Avalon (A England) and an acrylic Cheshire grin. 


Next up is Her Imperial Viciousness, another favorite of mine! As luck would have it, I just happened to be wearing a red shirt when I swatched this, so it matched pretty well. This was also two squishy coats with wonderful coverage and glitter distribution! There were also black heart glitters in this that I only managed to get one of on my middle finger. I have very rounded nails so I tend to avoid larger glitters like that on purpose because they won't stay flat on my nails, but turning the bottle upside down for a couple minutes would certainly help if you wanted more hearts. On my accent nail I stamped using Alter Ego (Cirque Colors) and my plate 1-01 from Uber Chic Beauty. I'm such a huge fan of classic reds like this that make me look more pale than I am, it makes the polish look so bold and bright! 


This polish was actually the first polish that I noticed on Cassie's IG and thankfully I commented and she was sweet enough to offer me a chance to swatch for her! Before I forget, make sure you go follow her on Instagram so you don't miss out on any news considering new collections and any possible restocks of these! You won't be disappointed and she has a criminally low number of followers for the quality of her polish. This was two coats of Whooo R U? on all nails except my accent nail which was Scoundrel (Mentality Polish). I stamped using the opposite color on all nails using my Sailor 07 plate from MoYou London to give a hookah smoke sort of pattern to emphasize the inspiration of the polish. This one is so hard to capture on camera since it has so many hidden shimmers and looks so amazing from all angles, but I did get a video on my IG that absolutely won't load here so I'll just leave the link! 


The final polish that I have for you from this collection is Curiouser and Curiouser! This was two coats on all nails except my accent nail which was the fitting Miss Alice (Stardust Polish). This is such an amazing baby blue holo with a magnificent gold shimmer in it, it encompasses Alice so perfectly! I stamped some gold bows using Dapper (Mentality Polish) and my Alice 07 plate from MoYou London (again, I know, but it was so perfect for this collection!). 

Overall: This collection had astounding quality and creativity, especially for a debut collection from a new indie! Cassie blew me away with her inspiration (one of my favorite topics and stories of all time) and she translated them into unique but still very obviously fitting polishes. I'm very excited to see what else she has in store! 

Disclaimer: These polishes were all provided free of charge for my honest review,

This whole collection is still available for purchase from Lemming Lacquer ($65 for the whole collection, $16 for the Drink Me/Eat Me duo, and varying prices for each individual polish depending on the finish of it). I suggest getting in on this brand before she starts selling out instantly, her polishes are quite fantastic and I have it on good authority that she has more amazing things to come! 

Thursday, April 2, 2015

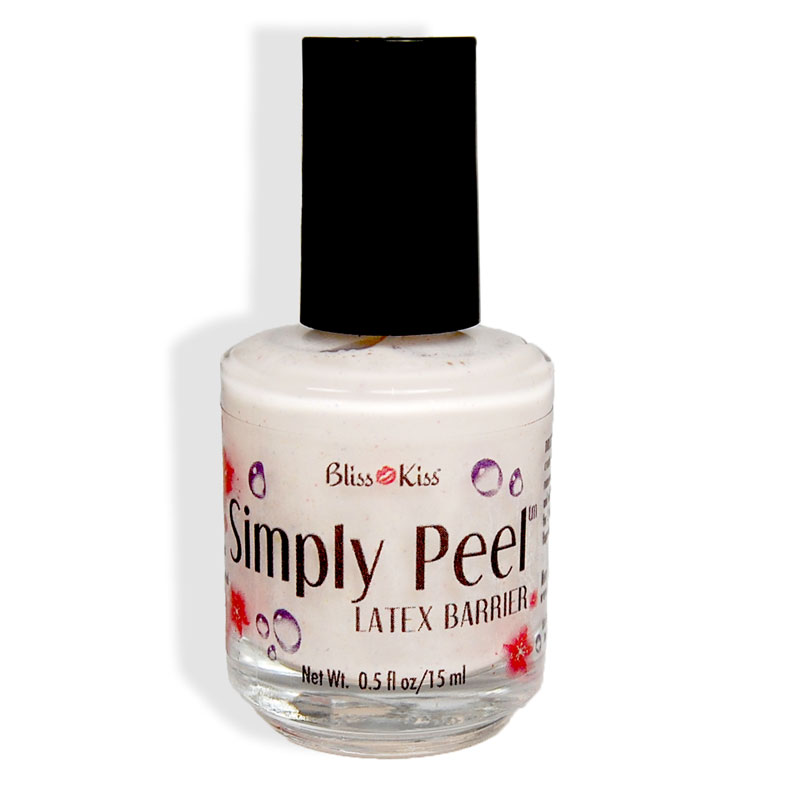
Simply Peel (and more!) Review!

This post is so long overdue, but I've finally found the time to sit down and do it justice. A couple months back I was lucky enough to visit the lovely Ana of +SimpleNailArtTips/Bliss Kiss and she was sweet enough to give me a sample bottle of Simply Peel to review before it was released. Of course, I'm way behind in actually posting it, but I've been using it ever since and I'm so in love!

WARNING: THIS IS A LATEX PRODUCT, DON'T USE IT IF YOU ARE ALLERGIC!!!

Image Credit: http://nailcarehq.com
One of my favorite things about this product is that it's actually unique. By that I mean that it isn't just rebottled liquid latex from Amazon! No offense to brands that do that, I have nothing against it, it's just so awesome to know how much work she went through to formulate this and make it unique and actually helpful to your skin! I used it for a few different things to show how versatile it is, so hopefully this break down helps you realize how much you need it.


The first thing that I wanted to try after getting this product was using cuticle remover while wearing it. Much to my surprise, Ana informed me that cuticle remover can damage your living skin just as much as your cuticles. To think I've been damaging my fingers this whole time! So I put on this barrier around my nails before I used cuticle remover so that it wouldn't harm my living skin but I was still able to safely remove my cuticles. 


After you put on cuticle remover the edges of the latex will turn a little white, but Ana assured me that the skin is still fully protected!


After my nails were all clean from the cuticle remover, I enjoyed a few rounds of Bliss Kiss to get my nails super healthy!


I decided to do some nail art to show how crazy useful Simply Peel is, so I started off with one coat of Simply Smooth for the base. Ana also gave me a mini of this to try out, and it's super amazing! It's really smooth (go figure) and dried very fast. I love it! Side note: I did these steps a couple weeks apart, so my nails are much longer from this point on...you are not imagining things.


I started off with two coats of April 2014 for the base of my crazy nail art extravaganza because I felt like doing some purple nails. I also used one coat of Simply Quick top coat from Ana to seal this before I moved on.


This is what Simply Peel looks like as soon as you apply it...


And this is what it looks like when drying/dried. It has little glitters in it! GLITTERS.


I chose a gradient to begin with since I just love them I used April 2014 (Enchanted Polish), Charmingly Purple (ILNP Brand), and June 2014 (Enchanted Polish).


This is what it looks like after one quick grab with tweezers! Still a tiny amount of clean up will be required since you can't get it too close to your design or it'll pull up too, but soooo much better than gradients without liquid latex!


After a little bit of clean up and another coat of Simply Quick, my gradient base was done!


Next I stamped over one of my nails using June 2014 and one of my Bundle Monster plates! While this particular color wouldn't have been so terrible to get off skin, this barrier saves so much time on clean up and would be a lifesaver for reds/blacks/deep blues!


The next thing that I wanted to try was using Simply Peel for some negative space designs. I decided to do a half moon design since it was the easiest for me to work with, having not been use to maneuvering the latex very well.


Here's what my nail looked like after sponging on one coat of Lusty Lavender (Painted Polish) without removing the latex. Yikes! Could you imagine cleaning that up without a barrier?!


And here's what it looked like after removing it!!! Without any clean up! I'm telling you, magic.


Here's my final, very purple look with a final coat of Simply Quick over everything. Liquid latex is a lifesaver in general, but Simply Peel is by far my favorite that I've tried.

OVERALL: The drying time will vary based on how thick of a coat that you put on, I found mine to be roughly 2 minutes in general. You'll want to be sure to do alternating nails so you don't stick your fingers together because it'll just all pull off in one piece! Also, make sure that you clean your brush off after each use so the latex doesn't dry off and clump up the whole bottle.

AGAIN: DO NOT USE THIS IF YOU HAVE A LATEX ALLERGY!!!

This product was provided, free of charge, for my honest review. I love this product a ton and I'm absolutely going to be purchasing more as soon as I run out!

If you want to try this product out for yourself, head over to Nail Care HQ and grab a bottle for yourself! Simply Peel is available for $11.99/15ml

Happy Birthday Lillian Eve!


Hello there! Today I have a special post for you all since it involves a giveaway! I was recently contacted by the lovely Tiffany of Lillian Eve to help her celebrate her first anniversary since LE began business in April of 2014. I've followed her on Instagram for some time and I was very excited to be a part of the celebration! I have some springy manis that I'm going to do using a few of her polishes in celebration of her brand's anniversary, but for now I'll just share the Rafflecopter so you can get in on this party!


a Rafflecopter giveaway

Friday, February 27, 2015

Delush Polish - Spring to Conclusions Review!

Hello there again! Today I have a for fun review of Delush Polish's spring collection - Spring to Conclusions. This collection of 6 cheery spring shades was just so perfect that I had to swatch them and share them with you all!

Image Credit to Adrianna of Delush Polish!
For all of these swatches I wanted to show them both glossy and mattified because they look so very different and gorgeous!

Glossy
Matte
The first polish I chose to swatch was An Offer You Can't Refuchsia! I used two coats of this squishy and magnificent polish for full coverage. This was probably the polish with the most glitter, but that didn't make it difficult to apply. As with any glitter-filled jelly, as long as you don't try to apply another coat before the first is dry, there won't be any dragging or issues. I absolutely love this color combination and it is just so perfect for spring and summer.

Glossy
Matte
The next polish that I tried was A Peony For Your Thoughts! This was also two squishy coats. I didn't have any difficulty grabbing the larger circle glitters, although I did leave all of my bottles upside down for a few minutes before swatching them. As with all the others, this had a great formula and went on very smoothly!

Glossy
Matte
The third polish from this collection that I swatched was Amazemint. This shows it being a little bit brighter than it really is, but I promise that it's the most perfect teal/mint. I loved the small glitters in this that made it very subtle and wearable. 

Glossy
Matte
The next polish that I tried out was 50 Shades of Yay! I had more issues making the glitter look evenly spread out on this one, but that was really only my OCD that wanted it more even, it still looked gorgeous. For this swatch I used two coats on all nails to create this squishy joy!

Glossy
Matte
The fifth polish that I swatched in this collection was Springing In The Rain! I used two coats for this swatch as well, and had no difficulties with formula or application. This whole collection was just so well-made! I'm madly in love with this color combination, it just works perfectly with spring in Seattle to me.

Glossy
Matte
The final polish that I swatched was In the Prime of My Lime. This one required three coats because it was a little more sheer, but it still dried quickly and I had no application issues. This polish reminded me so much of margaritas, I couldn't help but think of them whenever I looked at my nails!

Overall, this whole collection was amazing. I've been trying to spend a little less money on polish since I quit my job, but I just knew I had to splurge on this whole collection because I needed them alllllll!! I purchased all of these myself with no request to review them, I just wanted to share how much I love them with you all.

These are available through Delush Polish's website for $4.50 per mini, $8.95 per full size, $25 for the set of minis, and $48 for the full size set. 

Nail Crazies Unite! - February

I'm so excited to be taking part of this fun group! Two of my favorite IG girls (@cdbnails143 and @roselynn787) created this challenge as an easier way to do themed monthly challenges without the insane task of doing intricate nails every day or two. Some people with full time jobs and/or kids miss out on things like this because they just don't have the time to join in. So I was thrilled to get to see this supportive group and time-friendly challenge! I'll be uploading all of my pictures for each week of the challenge on both my blog and my Instagram, so make sure you check back for them and look out for other members' posts as well!


Week 1: Anti Vday


For this week's design I did some negative candy hearts over a pink to red gradient. The gradient was done using Cutie Pop (ILNP Brand), Yes Your Majesty (Stardust Polish), and Briarwood (A England) and the hearts and letters were done using acrylic paint. I really love this design! This one was using Simply Quick Top Coat from @simplenailarttips on IG.


I also mattefied my previous look because it made it a little easier to read the words, but I love it matte too! 


Week 2: Love Song


I got a little behind with this challenge due to school and real life, but I still wanted to upload my pieces for each one even though they weren't included in the InLinkz because I missed the deadlines for weeks 2 and 3. For week two I decided to do Enjoy Your Day by Alkaline Trio because it's one of my favorite love songs, even if it's a sad one. I used Peppermint Twist from Laquerlicious (now Polish 'M) for my pointer and middle fingers and Love Fool from Bliss Polish on my ring and pinky fingers. I used acrylic paint to write Enjoy Your Day, Veruschka from Zoya for the rose stems, and finally Velvet Rope and Killer Curves from Color Club for the petals. I did this in both matte and glossy, but for some reason the matted version just seemed more fitting to me.


Week 3: Candy


For my candy design I chose to do Hot Tamales because they're my favorite candy in the world! This design was actually really easy to do, I'll have to remember it in the future. I used Over and Over A-Gwen from OPI for my base and freehanded the Hot Tamale edges with Mrs. Mia Wallace from Urban Decay. After that I added small "highlights" using Peppermint Twist from Laquerlicious again and used a wax effect topcoat to make it look more like candy. I really loved these!


Week 4: Fruit


These might have been my favorite nails for this whole challenge! I thought about doing a different type of fruit, but since it was near Valentine's day I thought the chocolate-dipped strawberries would be fitting. I used Valley of the Dolls from Nvr Enuff Polish for the base, Cosmic from Nvr Enuff Polish for the strawberries, acrylic paint for the seeds, Dragon from A England for the stems, and Hot Chocolate for Unicorns for the tips. I think these worked well with my nail shape and they looked so fun! 


Sunday, January 25, 2015

Nvr Enuff Polish - Candy Land Review!

Oh my gosh, an actually on-time blog post?! What is this!? This collection sold out so quickly that the wonderful ladies of Nvr Enuff are working their pretty butts off to get them restocked later this week or next week (early February 2015). So get your wishlist ready! To kick off the new year, Lynnae and Alix made another small and perfect collection devoted to the magnificent world of Candy Land. Honestly, these might be four of my favorite polishes to date. Of theirs or anyone else's. THEY'RE JUST SO GREAT.


Is this not just the perfect, most sparkly collection? I played the Candy Land board game when I was little (not to mention I've always been a fan of candy in general), so I was excited to see this collection come to life! One of my favorite parts about swatching for ladies my age is we all had similar interests in our childhood so I get to relive fun things every time they make a collection.

A light blue jelly packed to the brim with holo glitters, and a hidden pink fleck!
Dries slightly textured, use top coat for a smooth shine!
Queen Frostine is such a beautiful blue with LITERALLY the most hidden pink shimmer! In person it's much more apparent, but for some reason this polish really just photographs as blue. You can see a hint of the pink shift in the top right edge of my bottle macro, but that's about it. In any case, Queen Frostine is slightly textured without a topcoat just like this whole collection, but it looks beautiful both ways. It dries very quickly and builds opacity just as amazingly as the rest of their collections.


I think this polish really complements my skin tone very well, so if you're a pale chica like me - get on this right quick! I really loved the slight texture that all of the glitters gave this whole collection. It was still smooth enough that it didn't get caught on shirts or anything, but it had an interesting look! I used Plastered In Pink (Painted Polish) for my thumb to show off the pink in Queen Frostine, two coats of QF alone on my pointer finger, two coats of QF with topcoat on my middle and ring fingers, and one coat of QF over Camelot (A England) on my pinky finger with topcoat.

A super holo gold dense glitter with sparks of pink and blue holo!
King Kandy is probably my second favorite from this collection. It has such a unique combination of glitters that it could really but used as an accent nail for so many manis! I just love how much versatility these ladies give their collections. As with the others, this one is slightly textured without topcoat and still dries and applies very well.


Do you see all of the different colors show up?! It's so amazing they even managed to cram them all into one bottle! For this swatch I used two coats on my thumb, one coat on my pointer finger, one coat sponged on my middle finger, two coats of Afterglow (NEP) on my ring finger, and one coat of King Kandy over one coat of Afterglow (NEP) on my pinky finger. This polish was so dense with one free coat, seeing how dense it was sponged on was just astounding! The time that sponging saves for me makes me so excited because it means I could just throw this on in minutes and look all sparkly and awesome.

A dense gold flakey with light pink and bright pink holo glitters,
dries slightly textured but smooths out perfectly with top coat!
I've said it before, and I'm sure I'll say it again, the ladies of Nvr Enuff constantly make me love pink! They're trying to convert me! After using this polish, I absolutely know what I'm doing for my Valentine's nail art because it's just so romantic and perfect. As with the others, the textured effect was subtle enough to not snag on everything but still looked very cool! I used topcoat on all my nails to show the depth of the sparkles, but it still looked beautiful without it.


It's so pink and gold and just a;joiefja; so much love. Again for this I used two coats on my thumb, one coat on my pointer finger (HOW DENSE IS THAT ON ITS OWN??), one coat sponged on my middle finger, two coats of Afterglow (NEP) on my ring finger, and one coat over one coat of Afterglow (NEP) on my pinky finger. 

A deep jelly purple with packed with purple, burgundy, and maroon glitters!
Dries slightly textured, but with top coat shines like a dream!
Are you ready for my favorite polish of the collection?! In all fairness, all of the others tied for second, but this purple is just drop dead beautiful. I might get a shirt that says "I own Lord Licorice from Nvr Enuff Polish" so that people bow to me in the streets. The biggest sign that this is a polish you need in your collection is that it would not photograph as pretty as it actually is! For some reason, all of the most beautiful polishes in the world just refuse to be photographed well.


The base of Lord Licorice is so deep and vampy and the glitters are so bright and cheery, I just love the combination of the two. I just want to pour it all over everything that I own! For this swatch I used two coats on all of my nails except my accent nail which is Radiantly Wrecked (Painted Polish). Again, this looked beautiful with no topcoat, but it really brought out the shine in the glitter. 

Overall, this entire collection is just a must-have. I recommend stalking the heck out of their Instagram to see when this restock will be so you don't miss out! 

As always, these polishes were sent to me at a discounted rate for my honest review and swatches, and everything that I've shared is 100% my honest opinion.

As I said, these polishes are all currently out of stock, but will be restocked sometime in late January or early February. I recommend heading over to http://nvrenuffpolish.bigcartel.com/ nonetheless and getting whatever you can possibly grab anyway! Make sure that you follow @nvrenuffpolish on Instagram to get all of the updates on any upcoming releases and/or restocks!