Showing posts with label nail routine. Show all posts

Thursday, June 25, 2015

Lemming Lacquer - My Lemming Tis of Thee Trio and Bath Products Review!

Hello there! First up tonight is a slightly belated review for you since it included bath products that Cassie wanted me to try out for a few weeks before reviewing. First up I'll review the polish since it's a little less in-depth.


This collection consisted of two gorgeous and opaque holos and one glow-in-the-dark glitter topper. Not only are these all super patriotic, they're just such gorgeous colors, you really can't go wrong!


First up is two coats of Right of the People. This is one of the most perfect true red holos that I've ever seen. The application is so opaque and smooth that you could probably get away with one coat, but I usually do two just to make sure I cover any spots that I missed. Overall, A+++++! My red-loving self is all about this polish.


Next up is two coats of Blessings of Liberty. I was so surprised to find that I really have no polish in my collection that matches this color and quality! This was the same as Right of the People in that it probably could have been one coat easy. The application and color was just as perfect on this one, there really aren't any other words to describe it!

Daylight Bulb
After 30 Seconds Under Daylight Bulb
I was so excited to try out Pursuit of Happiness because I really don't have enough GITD polishes, and zero that are toppers! I was happy to discover that despite being GITD, this applied just as easily as any other glitter topper. I didn't have any issues with fishing for glitter either! I used one coat over Right of the People, Blessings of Liberty, and Alpine Snow (OPI).


The last look that I did with these was in combination with a duo from Painted Polish and Polish 'M. I used American Spirit (Polish 'M) for the base, did a glitter gradient using Life, Liberty, and the Pursuit of Holo (Painted Polish) on my pointer and pinky fingers, drew on some stars using Right of the People, and did some zigzag vinyls using Blessings of Liberty. I was so happy with these, very patriotic!

Next up in my review are the mani bombs that I received from Lemming Lacquer! These were a product that she just came out with, so she sent me a few new scents to play with and review.


The first one I tried out was the American Pie scented red white and blue star mani bomb! This one really does smell like cinnamon and fresh apples, it's entirely mouthwatering. I threw the mani bomb into this small bowl of water and soaked my hands in it for a few minutes, dried them off, and added lotion and cuticle oil! The mani bomb really made my hands feeling super smooth right away and it smelled absolutely amazing.


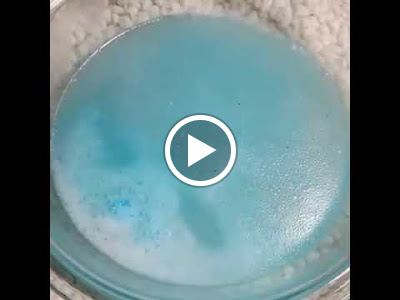
About a week after trying the American Pie scent, I went back for seconds with Tropical Fruit Breeze. I'm a huge fan of fruity scents and Alice, so I absolutely loved the design and scent of this one! You can't see it great in this picture, but this bomb has some microglitters and shimmer so you look nice and sparkly after your soak, I totally love it! I still have a couple of mani bombs to try, so I'll update you on those scents as well. I just didn't want to waste them all in a month!


The last thing that I was sent for review is this delicious new cuticle oil! As per her request, I've been using it exclusively since I received it, and let me tell you how glorious it is. It has a really smooth application, which I absolutely can't emphasize enough. The roller doesn't put too much on your hands and I haven't had any problems with it leaking in my purse, and I have with other rollers like this. The actual oil is really velvety and absorbs so quickly! Since the roller doesn't put too much on, I can pretty much get one good swipe over my cuticles and rub it in and I'm all set. I'm really in love with this! Not to mention, this scent might be one of my very favorites of anything. It's called Bedroom Hymns and I highly recommend it! It's a subtle but fruity scent with some musk undertones that's very unique and tantalizing, I honestly can't say enough nice things!

DISCLAIMER: These products were all sent to me for free from Lemming Lacquer to honestly review and these are all my honest opinions on the products that I received.

If you'd like to buy any of your own, these are all currently for sale in Lemming Lacquer's shop!

Monday, May 18, 2015

Mermaid Scales Pictorial!

I've had a handful of people ask me how I do my gradients/stamping over the past few months, so I spent some time this morning doing a short pictorial about the process I go through for gradients and stamping. I did a shortened version on my Instagram this morning, but this will be a little bit more in depth since I had such limited space there!


I decided to do some mermaid scales for this tutorial since whenever I do this design I get questions about it. In short, it was a green to blue gradient with darker blue stamping over it. I used all Mentality Polish for these since they're opaque enough to make amazing gradient and stamping polishes.


This step may seem silly and obvious, but I've forgotten about it enough times to make it worth mentioning...MAKE SURE YOUR STAMPING PLATE IS CLEAN. So many times I'll stamp something and throw the plate back into my stash without cleaning off the extra polish, it just makes it so much more annoying later on. The worst part is when you're all ready to start stamping and you have to take time out to clean off a plate, especially when the acetone can mess up your perfect gradient!


After my stamp was all ready to be used, my first step was one coat of Pastille with topcoat. Parts of it are still rather sheer, but that isn't a big problem since it'll be sponged over pretty soon. Note: This sort of technique ONLY works when you're doing a gradient using similar shades/colors. If you're doing a gradient that's a rainbow or something of that sort, you'll almost definitely need a white base to make the colors pop. If you do a gradient over another color, the colors will muddle together and not look nearly as bright.


After cleaning up around my cuticles and waiting for the top coat to dry, I put a decent amount of Simply Peel latex barrier around my nails so the gradient didn't cover my whole hand. This was mid-drying so some fingers still show white while others are clear. Wait for this to dry and then continue on!


The next step involves opening all of the bottles that'll be included in your gradient and placing them in a safe area. I say safe because I've ruined many a mani trying to grab my cat away from nuzzling open polish bottles...You want to keep them open with the lid placed on top for the entire time you're doing your gradient so that they're easily accessible. This prevents your polish from drying completely before you've finished your gradient. For this gradient I used Pastille, Duet, Gumdrop, and Scalawag.


Next up you want to do pretty thick layers of each polish on your makeup sponge. Make sure you use a latex-free sponge or it won't work nearly as well! I like having the lightest color on the top and the darkest on the bottom, but it's really personal preference at that point. You have to put quite a bit of polish on the sponge since it'll (obviously) absorb some of it before you even get it on your nails.


Here's a mid gradient shot of one pass with the sponge. You'll have to repeat the sponging process until you're happy with the opacity and blending of the different colors. I tend to go a little overboard because I love when it starts looking so smooth that it could be mistaken for a thermal!


After all of your nails are blended to your satisfaction, take off the latex barrier with some tweezers. You want to try to do these steps as quickly as you can so that the polish doesn't dry since it makes taking the latex off much more difficult. If you don't have any liquid latex to use, you can still do gradients - THEY'RE JUST VERY MESSY. I did a lot of gradients before discovering this trick, they just take a lot of q-tips and clean up. I've seen some people use Scotch tape around their nails to help with some of the mess too.


After you apply another layer of top coat and clean up around your cuticles, you're ready for more Simply Peel latex barrier. Make sure all of these steps are dry before you get to stamping or it can be really frustrating and you'll have to start over.


Everyone tends to stamp in minorly different ways, but I always do a pretty thick layer of polish (in this case, Offbeat) on the left and top of the design I'm going to use. I'm right-handed, so when I slide the card off to remove the excess, this pattern ensures that I'll get all of the polish over the whole design.


Here's what the plate looks like after you've scraped off the excess polish! It should be visible that there's polish in the cracks to make sure that you've covered the whole design that you want to use.


Next you'll want to squish your stamp on top of the plate. I usually put the bottom down to line it up and roll it up a little bit to try to grab the whole image. Again, everyone stamps a little different, but this works for me and helps me to not stretch the image or have chunks missing. Another little tip, if your image doesn't fully get on there - don't fret! You can squish your stamp onto a lint roller and it'll take the whole image off without damaging your stamp with acetone (PLEASE DON'T USE ACETONE ON STAMPS! It breaks it down and you'll regret it!).


After you're done stamping, remove the latex, apply top coat, and clean up around your cuticles one last time! And that's all she wrote. It looks like a lot of work when it's finished, but if you practice the entire process is so simple and fun - you won't even think about it twice. I hope this helped some of you out a little bit! Let me know if you have any more questions, and tag me @whimsicalicious on Instagram if you use this tutorial, I'd love to see what you all come up with!

Cuticle Care Routine - Updated!

I did this post a while back, but deleted it months later since it wasn't even accurate anymore - so here's an updated version. I was recently asked on Instagram how I care for my cuticles so here's a little more in depth description of what I do to keep my nails healthy. Let me know if I flaked out and missed a step, I'd be happy to answer any questions!


This is a more intensive cuticle care day than normal since I only do this entire routine about once a month, but this is how I keep my hands, cuticles, and nails healthy! I've left a little bit of detail out since I have full reviews for some of the products that I use in separate blog posts, but I'll still mention them throughout the process.


Step one is this weird bowl of oily goo! A while back on Instagram I saw a blogger I followed post about how she keeps her nails white and her hands soft and ready to be manicured, so I've used this concoction ever since. I don't do it super often since it requires a lot of prep and time afterwards to make sure your nails get oil back (soaking them in water already probably makes Ana cringe!), but I find that it really helps them look healthy for me. After that intro, this is simply a bowl full of hot water, some vinegar and baking soda, and as much olive oil as you can spare. If I was rich I would use a lot more of it! After I have this all ready, I have a couple of products that I throw in there too that I'll talk about in a little more detail next.


The first thing I always add is my Sweet Baby by Donna Nail Whitening Soak! She hasn't made this in a while since she can't get all of the ingredients for it, but hopefully she gets the chance to bring it back since it's a must-have. I put a little spoonful into the mixture I already have and let it melt in a little bit. Next I tend to put an unreasonable amount of mani bombs, sugar scrubs, and other hand care products in because TREAT YO'SELF. This time I used a Pink Sugar Sugar Scrub Tab from Nikki Rose Bath and Body and a Lemon Verbana Mani/Pedi Bomb from Bomber Babe Hand Refinement.


Here's a better look at the Pink Sugar tab from NRB&B! I'll have a more specific review for this one along with the other products that they were sweet enough to send for me to review, but in short - it was awesome. It smelled amazing and it was really easy to use! I dipped it in the water a little bit so it started to break up and I rubbed it into my hands until it broke down enough to scrub some on my nails. It left my hands feeling super smooth and smelling delicious!


And here's a better look at the mani bomb I used! This one I threw into the water and let fizz away before I soaked my hands in it. I usually try to soak them for about 10 minutes, but I tend to get distracted or impatient and it usually ends up being less than that. All of the oils and goodies in these help make your hands and cuticles even softer, which helps remove them later!


Next up I put on my Simply Peel Latex Barrier before I used cuticle remover. I did a whole separate post on this stuff, but in short it protects your live skin from the damaging stuff in cuticle remover! That way you only take off what you want to. I made sure to let it dry before putting on my preferred cuticle remover, waiting the allotted time, and scraped everything away with a wooden cuticle stick.


After removing the latex and cleaning off all of the extra remover by washing my hands, my nails were a little raw. I anticipated this since I'd been painting them a lot without enough oil, so I made sure to slather lots on! I use a lot of different cuticle oils and creams, but recently I've been using a combination of Polish TBH's Good Morning Mocha, Sweet Baby by Donna's Tao Cacao, Bliss Kiss Crisp, and Sunny's Bath Product's Better Than Sex Cake. They all smell delicious and work so well together!


After a lot of oiling and a little bit of filing to even out my nail shape, my nails were nice and white! This was actually the picture that I was asked to do this review on, so we've definitely come full-circle. This was mid-oiling, but whenever I've oiled them enough I put on my Smooth Gem Base Coat to protect them whenever I'm not polishing them. Hopefully this all helped you learn my routine a little better! Does anyone else have any hand care products that they can't live without?

Thursday, April 2, 2015

Simply Peel (and more!) Review!

This post is so long overdue, but I've finally found the time to sit down and do it justice. A couple months back I was lucky enough to visit the lovely Ana of +SimpleNailArtTips/Bliss Kiss and she was sweet enough to give me a sample bottle of Simply Peel to review before it was released. Of course, I'm way behind in actually posting it, but I've been using it ever since and I'm so in love!

WARNING: THIS IS A LATEX PRODUCT, DON'T USE IT IF YOU ARE ALLERGIC!!!

Image Credit: http://nailcarehq.com
One of my favorite things about this product is that it's actually unique. By that I mean that it isn't just rebottled liquid latex from Amazon! No offense to brands that do that, I have nothing against it, it's just so awesome to know how much work she went through to formulate this and make it unique and actually helpful to your skin! I used it for a few different things to show how versatile it is, so hopefully this break down helps you realize how much you need it.


The first thing that I wanted to try after getting this product was using cuticle remover while wearing it. Much to my surprise, Ana informed me that cuticle remover can damage your living skin just as much as your cuticles. To think I've been damaging my fingers this whole time! So I put on this barrier around my nails before I used cuticle remover so that it wouldn't harm my living skin but I was still able to safely remove my cuticles. 


After you put on cuticle remover the edges of the latex will turn a little white, but Ana assured me that the skin is still fully protected!


After my nails were all clean from the cuticle remover, I enjoyed a few rounds of Bliss Kiss to get my nails super healthy!


I decided to do some nail art to show how crazy useful Simply Peel is, so I started off with one coat of Simply Smooth for the base. Ana also gave me a mini of this to try out, and it's super amazing! It's really smooth (go figure) and dried very fast. I love it! Side note: I did these steps a couple weeks apart, so my nails are much longer from this point on...you are not imagining things.


I started off with two coats of April 2014 for the base of my crazy nail art extravaganza because I felt like doing some purple nails. I also used one coat of Simply Quick top coat from Ana to seal this before I moved on.


This is what Simply Peel looks like as soon as you apply it...


And this is what it looks like when drying/dried. It has little glitters in it! GLITTERS.


I chose a gradient to begin with since I just love them I used April 2014 (Enchanted Polish), Charmingly Purple (ILNP Brand), and June 2014 (Enchanted Polish).


This is what it looks like after one quick grab with tweezers! Still a tiny amount of clean up will be required since you can't get it too close to your design or it'll pull up too, but soooo much better than gradients without liquid latex!


After a little bit of clean up and another coat of Simply Quick, my gradient base was done!


Next I stamped over one of my nails using June 2014 and one of my Bundle Monster plates! While this particular color wouldn't have been so terrible to get off skin, this barrier saves so much time on clean up and would be a lifesaver for reds/blacks/deep blues!


The next thing that I wanted to try was using Simply Peel for some negative space designs. I decided to do a half moon design since it was the easiest for me to work with, having not been use to maneuvering the latex very well.


Here's what my nail looked like after sponging on one coat of Lusty Lavender (Painted Polish) without removing the latex. Yikes! Could you imagine cleaning that up without a barrier?!


And here's what it looked like after removing it!!! Without any clean up! I'm telling you, magic.


Here's my final, very purple look with a final coat of Simply Quick over everything. Liquid latex is a lifesaver in general, but Simply Peel is by far my favorite that I've tried.

OVERALL: The drying time will vary based on how thick of a coat that you put on, I found mine to be roughly 2 minutes in general. You'll want to be sure to do alternating nails so you don't stick your fingers together because it'll just all pull off in one piece! Also, make sure that you clean your brush off after each use so the latex doesn't dry off and clump up the whole bottle.

AGAIN: DO NOT USE THIS IF YOU HAVE A LATEX ALLERGY!!!

This product was provided, free of charge, for my honest review. I love this product a ton and I'm absolutely going to be purchasing more as soon as I run out!

If you want to try this product out for yourself, head over to Nail Care HQ and grab a bottle for yourself! Simply Peel is available for $11.99/15ml

Happy Birthday Lillian Eve!


Hello there! Today I have a special post for you all since it involves a giveaway! I was recently contacted by the lovely Tiffany of Lillian Eve to help her celebrate her first anniversary since LE began business in April of 2014. I've followed her on Instagram for some time and I was very excited to be a part of the celebration! I have some springy manis that I'm going to do using a few of her polishes in celebration of her brand's anniversary, but for now I'll just share the Rafflecopter so you can get in on this party!


a Rafflecopter giveaway

Friday, February 27, 2015

Delush Polish - Spring to Conclusions Review!

Hello there again! Today I have a for fun review of Delush Polish's spring collection - Spring to Conclusions. This collection of 6 cheery spring shades was just so perfect that I had to swatch them and share them with you all!

Image Credit to Adrianna of Delush Polish!
For all of these swatches I wanted to show them both glossy and mattified because they look so very different and gorgeous!

Glossy
Matte
The first polish I chose to swatch was An Offer You Can't Refuchsia! I used two coats of this squishy and magnificent polish for full coverage. This was probably the polish with the most glitter, but that didn't make it difficult to apply. As with any glitter-filled jelly, as long as you don't try to apply another coat before the first is dry, there won't be any dragging or issues. I absolutely love this color combination and it is just so perfect for spring and summer.

Glossy
Matte
The next polish that I tried was A Peony For Your Thoughts! This was also two squishy coats. I didn't have any difficulty grabbing the larger circle glitters, although I did leave all of my bottles upside down for a few minutes before swatching them. As with all the others, this had a great formula and went on very smoothly!

Glossy
Matte
The third polish from this collection that I swatched was Amazemint. This shows it being a little bit brighter than it really is, but I promise that it's the most perfect teal/mint. I loved the small glitters in this that made it very subtle and wearable. 

Glossy
Matte
The next polish that I tried out was 50 Shades of Yay! I had more issues making the glitter look evenly spread out on this one, but that was really only my OCD that wanted it more even, it still looked gorgeous. For this swatch I used two coats on all nails to create this squishy joy!

Glossy
Matte
The fifth polish that I swatched in this collection was Springing In The Rain! I used two coats for this swatch as well, and had no difficulties with formula or application. This whole collection was just so well-made! I'm madly in love with this color combination, it just works perfectly with spring in Seattle to me.

Glossy
Matte
The final polish that I swatched was In the Prime of My Lime. This one required three coats because it was a little more sheer, but it still dried quickly and I had no application issues. This polish reminded me so much of margaritas, I couldn't help but think of them whenever I looked at my nails!

Overall, this whole collection was amazing. I've been trying to spend a little less money on polish since I quit my job, but I just knew I had to splurge on this whole collection because I needed them alllllll!! I purchased all of these myself with no request to review them, I just wanted to share how much I love them with you all.

These are available through Delush Polish's website for $4.50 per mini, $8.95 per full size, $25 for the set of minis, and $48 for the full size set.