Sunday, June 22, 2014

Pastel Galaxy Tutorial!

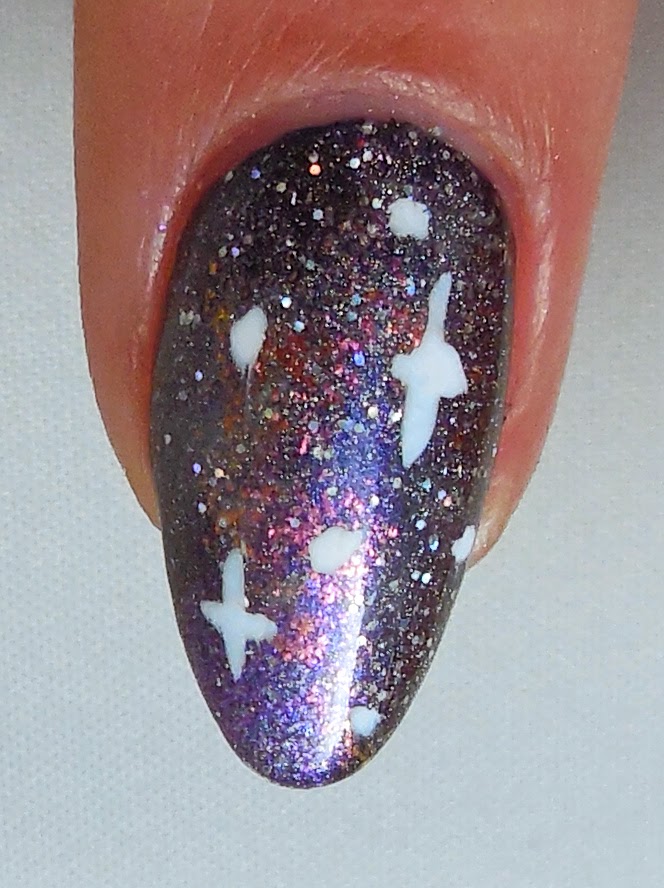
Sorry it's taken me so long to post this! I had a surprisingly busy week for it being the end of the quarter. I recently did a pastel galaxy mani inspired by the lovely @squeakynails on Instagram, and I wanted to share how I did them. Tutorial away!

The first thing I did was use my favorite base coat from Jior Couture, three thin coats of "You're Such A Budapest" from OPI, and NYC Grand Central Station.


After that all dried, I started to sponge on the three pastel colors that I chose for this. I used "Funny Bunny," "Sprout," and "Rain Boots" from B Squared Lacquer. I did this step until the base was no longer visible.


At this point, some of you might want to just add some stars and glitter and call it a day, but I wanted the colors to look a little more muted so I added another step. I decided to sponge on a thin layer of "You're Such A Budapest" on top to tone down the other colors and give it a more muted look. It might not look that different in pictures, but it looked much more toned down in person!


After that I added one coat of "We Kill the Sparkly Ones For Free" from Supernatural Lacquer while the others were still a little wet so that it would blend a little better. 


After the glitter dried a little bit, I started to paint on some "stars" and dots using "Snow Me White" from Sinful Colors.


Once the stars had dried, I put on another top coat layer and cleaned up the edges! Happy day! Here's the final product in the shade and in the direct sunlight. The sun made my hands look weirdly red in these, but at least my nails are sparkly! Hopefully this helped make it a little easier for those of you who don't try galaxy nails much. If you recreate them and you have an Instagram, tag me @whimsicalicious, I'd love to see them!

Shade
Direct Sun

Tuesday, June 10, 2014

Jior Couture Customs! (picture heavy!)

For those of you who don't follow me on Instagram, I recently purchased a few custom polishes from the lovely ladies at Jior Couture. I've always been hesitant to try to get custom polishes since they generally cost more and I was never sure if I would end up liking the result. In this case, I had no concerns going in and no regrets coming out! These ladies are magicians, I tell you. Since I love everything I've ever gotten from them, I was thrilled to get a chance to make these customs that are very close to my blackened heart.

As you may or may not know, I spend my Sundays with close friends and some family playing pen and paper RPGs. All of these polishes were made with some of my most beloved characters in mind. Even if you don't know what that is, I'm sure you can still enjoy the beauty of these polishes!


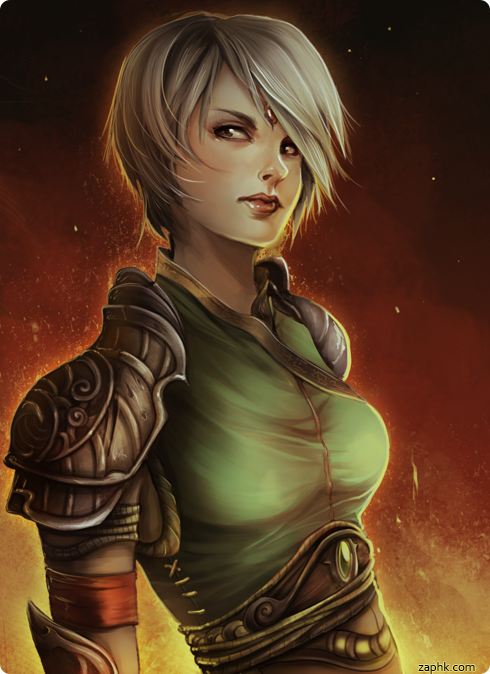
First up! Quui was named after my monk during our Rise of the Runelords Pathfinder campaign. She had some awesomesauce orange monk robes, hence the color inspiration! The only pictures I can find are both not wearing orange robes and designed off of Diablo 3 monks, but my D3 monk had the same name! So it all works out.

(Image Source: http://fc04.deviantart.net/fs71/f/2012/172/1/b/diablo_iii_monk_by_zaphk-d54a7dv.png)
My girl Quui wrecked the absolute crap out of things until she was squashed. Like, literally. A stone giant smacked her into the ground and she was pudding. Nevertheless, she will go down as one of my favorite characters I've played! So this one was dedicated to her lovely self.


For this, I did two easy and amazing coats of Quui from Jior Couture. After that, I used "Little Brown Dress" from Essie, "Cypress" and "Never Nude" from Cirque Colors, and "Wooden Shoe Like to Know?" from OPI to make some mountains. These are the mountains that my lovely monk was squashed in! I decided to add some dots to the top because it looked very empty. For some reason, my skin looks very colorless in this picture where it didn't in person. As expected, this polish is perfect in every way! Great coverage, amazing dry time, and no staining when I removed it. Love, love, love.


Here's a bit of a closer view!

(Image Source: https://blogger.googleusercontent.com/img/b/R29vZ2xl/AVvXsEgASzXGnLPKnoQOEtu7w_ud-BqV6Mx69V5RWh5XNgG2ueH5DWvjCpoz_V9DDeP7YlN13cD5XC4yJXoxmvjRNNPCeNpTD6T8NSEE4oN-dSsNgjplVu0eWjb0PZKS0vp1xu-Tm6minJViAujn/s1600/The_gelatinous_green_cube_by_Shockbolt.jpg)
Next up is Quiemita! Named after my cave druid in our first Pathfinder campaign, this gorgeous green is so exactly what I've been missing from my collection. I've spent forever trying to find this shade, and Jior Couture nailed it! I had acidic slime in mind when I designed this one, as Quiemta was a cave druid. After some random number of levels that I can't remember, she could have turned into an ooze (how awesome is that?) so I thought it was fitting. Quiemita, too, met an unpleasant fate. She was actually killed and then resurrected and then killed again like twenty minutes later in a TPK. GOOD TIMES. This was one of my favorite characters to play ever. She grew up in a cave, so it was really fun roleplaying her not understanding any social cues. For example, one time I super failed a roll to understand someone giving me sign language cues and I fell into some water and blew our cover. Anyway! To the actual polish.


For this lovely business here, I used three coats of Quiemita for the base. It was pretty opaque in two, but I prefer not seeing my nail line. The wonderful Quiemita's favorite food was cave mushrooms, so that's what I decided to draw! You should have seen the practice mushrooms for this, it was just a hilariously bad process. For the mushrooms, I used a base of "Yes Your Majesty" by Stardust Polish with "Little Brown Dress" by Essie for the dots and outlines. The underside of the mushroom is "Butt Bootie Naked" by Lacquer Lust and the stem is "Wooden Shoe Like to Know?" from OPI. As per usual, this polish was perfection. It dried very quickly and was easily removable despite being super glittery and gorgeous on the nail!


A sort of close up to see my mushroom that I'm unreasonably proud of and a better view of the shimmer!

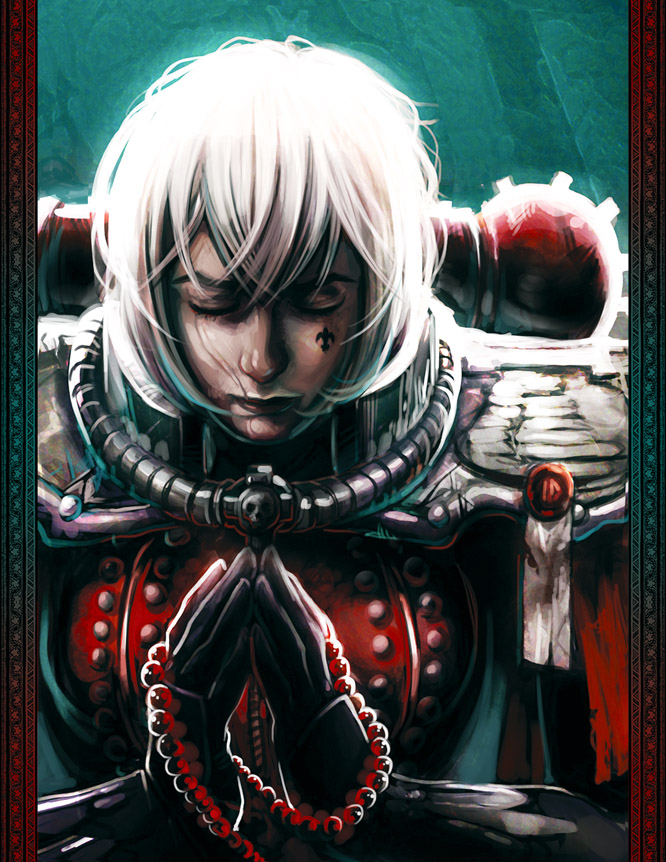
(Image Source: http://img2.wikia.nocookie.net/__cb20120409013052/warhammer40k/images/f/f9/Sister_Praying.jpg)
Last but abso-freakin-lutely not least is Moll. Moll was named after my Arch Militant in our very first Rogue Trader campaign. Mind you, that picture is of a Sister of Battle, but it's exactly what Moll looked like. The 40k world is one of my favorite things since sliced pie, so getting to have essentially limitless funds and connections in it was pretty awesome. Like, I had my own army on our ship. I saved this character for last since she is the only one still alive! Our campaign ended suddenly when my jerk friends were jerks and broke up our ship, but she will live to murder them in my campaign someday.


As with Quui, this was two coats and a breeze to use. Since Moll was an insane murderer, I gave her a blood accent nail using "Through the Fire" from Deborah Lippmann. In fact, I designed this polish off of the blood that she tended to spill. I miss the heck out of her! As with all of the above, I'm entirely in love with this polish.


More of a close up on this juicy, red holo!

Overall, these polishes were everything that I wanted and more than I expected! They were made and shipped in record time, and there was clearly no lacking in quality in the process. If you've ever been hesitant to buy custom polishes like I was, look no further! Jior's got you all set up. Check them out at www.jiorcouture.com.

Disclaimer/Note:
If it wasn't obvious, I paid for these myself. I wasn't asked to review them, I just honestly love them and wanted to share my experience!

Friday, June 6, 2014

Family Appreciation Nail Art #4 - Coffee, Teaching, and More!

Sorry I was MIA for so long, I've been fighting tooth and nail to finish this quarter strong and get into a child development undergrad program! As a reward for your patience, I've saved up a few posts that I think you will enjoy. First up is my final family appreciation post (for the time being). I saved my mom for last because she, like many moms, is probably my biggest fan. She is constantly looking at my Instagram (and updating me on how many followers I have, thanks Mom!) and liking/complimenting everything that I do. As you've seen from the last few family posts that I've done, I have quite a bit in common with all of my family members, but personality-wise I'm probably closest to my mom. As a result, her nail art is sort of an amalgamation of a lot of different things that we have in common or that remind me of her. So here we go!


First up is my thumb. This one was slightly more related to the names/themes of  the polishes than the actual design itself. Blue is my mom's favorite color though, so it worked out well! For the base I used two coats of "The Cold Never Bothered Me Anyway" from Royal Polish. And yes, I am a 6 year old at heart, so I've seen Frozen about a million times. My mom is a third grade teacher, so of course she knows all about it too! On top of that, I did one coat of "Men of Letters LE" from Supernatural Lacquer in the center of the nail. I just used the stock brush for this, so it's not perfect, but still pretty even. My mom used to watch Supernatural with me all of the time in high school, so every polish I get from this amazing brand reminds me a little of her! On top of THAT, I did one very thin strip of "Alpine Snow" from OPI. My mom was born in Colorado and used to ski as a child, so this one reminded me of her as well. I also used the stock brush for this, so the line isn't perfect. I was really happy with the final effect on this one! Very simple, but pretty.


For my pointer finger I decided to do a galaxy nail again. Every time I do galaxy nails my mom absolutely loves them, so I thought I should do one for the nails that were dedicated to her! This is probably one of my favorite color combinations that I've done and I really wish pictures did it justice. I liked it so much that I did my right hand all galaxified and did a tutorial on it! Since I'm going to have an entire post about how I did this nail and all of my right hand, I'll skip the spamming of polishes and mini tutorial on this one.


For my middle finger I decided to do another gradient. I am honestly obsessed with gradients and I do them whenever physically possible! In fact, I think I may make another post about them later today. I'm in a blogging mood. Anyways! For this I used a base of "Butt Bootie Naked" from Lacquer Lust. This is one of my all-time favorite polishes! On top of that I sponged "BBN," "Wooden Shoe Like to Know?" from OPI, and "Little Brown Dress" from Essie. I was pretty happy with it plain, but I decided to add a little nail art design of what inspired this color combination: coffee! My mom and I are both avid caffeinistas, a word that I really hope I was the first to think of. For this, I used "Alpine Snow" again and mixed in a little of "BBN" on the top of the cup and for the little swirly coffee lines, or whatever those are. For the little heart at the bottom, I used a dotting tool and "Yes Your Majesty" from Stardust Polish.


For my ring finger, I decided to do a sort of recreation of the apple mani that I did for an untried challenge hosted by two of my favorite Amys on Instagram. My mom is a teacher and I'm in school to be a teacher, so apples are obviously like half of what I eat. If only that were the case...Anyway! I used a base of two coats of "Totes Magotes!" from Dollish Polish. So glad I got this while it was available, I live by this minty holo! On top of that, I used the stock brush and "Yes Your Majesty" to make the little apple. I used a thin line of "Little Brown Dress" to make the stem and used some of my "Alpine Snow/BBN" mixture from my coffee nail to give it a little shading. I was surprised how much I liked this nail since I didn't think my original apple mani looked like an apple at all! I gotta represent my home state though. :)


For my pinky, I actually represented my mom's home state! She (along with most people in my house) is a huuuuge, huge Broncos fan. Unreasonably huge. She grew up in the Denver suburbs and has remained a die hard fan in her years away from the state. So I decided to do a John Elway nail! I used a base of one coat of "Ay Poppy!" from Cult Nails and a 7 I dabbed on using "Absolutely Alice" from OPI. For those of you who don't know this, I'm a huge Alice fan and I was so thrilled when a wonderful lady I follow on Instagram was selling hers! Again, I just used the stock brush for this. I guess I was just anti-nail art brushes on this mani. Topped them all off with Cover Me top coat from Jior Couture and went on with my day!


I honestly wore this for like three days, which is a pretty long time for me. Partially because I was so busy with school, and partially because I liked it so much I didn't want to remove it!


Hopefully you all enjoyed my last family-inspired mani for the time being!

Monday, May 26, 2014

Family Appreciation Nail Art #3 - Texas Hold 'Em!

Sorry I was MIA for so long! I had a long week with homework and allergies trying to kill me. Apologies in advance for ranting more than normal for this family appreciation, this one is a big one. Today I decided to (finally) finish my nail art that is dedicated to my dad. He has been supportive of everything I've done since I was a little kid, and nail art is no exception. My dad is a software engineer, a super smart guy, and a talented poker player. First, a little backstory on why poker means so much to me. When I was very young, I felt very inferior to both of my sisters. They were both in different sports, they were good at math, naturally talented at writing, taller than me...You name it, I was insecure about it! My dad was taught to play Texas Hold 'Em by my great-grandfather (his maternal grandfather) when he was very young, and he taught us in turn. When my sisters and I were much younger, we often had poker tournaments at the house. I was always really excited about them because I was actually good at poker! It really gave me something to be proud of and feel secure about at a time in my life where I felt useless. Since then, I've grown to accept my strengths and those of my siblings, but poker was the only thing that I felt good at for a long time. I still watch poker with my dad fairly regularly and I love when he calls me when he's playing to get advice or to tell me stories. It's something that has really bonded us over the years and I can't imagine our relationship without poker conversations!

As I've said, my dad has been so supportive throughout the years for every random thing I've grown attached to. He was even supportive when I got a tattoo of all of the card suits since it was in his honor. He is a very frugal and reasonable guy, so he doesn't remotely understand the amount of money that I spend on nail polish. He worries about my finances and constantly keeps an eye out for my sisters and I in that regard. He's done so much for us and he continues to astound me everyday with how amazing he is at being a dad. He shares my nails with friends from work (hi friends!), he asks me to send him pictures of my nails almost every day, he asks to see them whenever he gets home; I just can't even explain how much all of his support means to me. Now that I'm done being all sappy, I'll get to the actual nail art!


I stuck with black, white, red, and green ($$$$) for this mani, so it's pretty simplistic.


For the thumb and pinky finger, I used two coats of Supernatural Lacquer "Prototype 3" as a base. This shade is not available anymore, but it is extremely close to "GED & A Give Em' Hell Attitude." On my thumb, it was covered in one coat of Supernatural Lacquer "We Kill the Sparkly Ones For Free." I've blurred it a bit in this picture so you can see all of the gorgeous holo glitter in it!


On my pinky finger, I used one coat of 365 Days of Color "Nothing Suits Me Like A Suit." I know, I know, I basically put this on everything. It's just one of those must-have, perfect glitter toppers!


On my pointer finger, I used one coat of A England "Camelot" topped with one coat of 365 Days of Color "Pulling. It. Off." Again, this is just one of my must-have glitters! I use it on everything.


On my middle finger, I did a gradient using Pretty Serious Cosmetics "Nightmaren" for the base. I did one easy coat of Nightmaren with a quick coat of NYC "Grand Central Station" to seal it in. After that dried, I sponged on a combination of Nightmaren and Camelot until it was blended enough for what I had in mind.


Lastly, my ring finger! For this, I started with one thick coat of OPI "Alpine Snow." After that had dried enough, I put on one coat of GCS and let that dry completely. I decided that I'd rather use polish for this than acrylics since I really wanted the shimmer in Nightmaren to show up on the accent nail. I honestly used the tip of a sharpened colored pencil and a dotting tool to do every suit on here!


I hope you all enjoyed what is my second-to-last family nail art!

Sunday, May 18, 2014

Family Appreciation Nail Art #2 - Mass Effect!

Sorry I'm a bit late with this one! As luck would have it, the sister who these nails were designed to honor came over for a sleepover last night so we were all rather caught up with that. These nails were designed for my older sister, Amanda, and our shared love of Mass Effect. She is probably one of the sweetest people in the entire world to everyone and has always been incredibly supportive of my sister and me. She even made a post on Reddit bragging about my blog because she's like my second momma! It was really adorable. Anyways, I love her to freaking death. Now for the nail art!


I didn't do a close-up of my thumb or my pinky since they're not really nail art, but I'll still list polishes. My thumb has OPI "Over & Over A-Gwen" with one coat of 365 Days of Color "Nothing Suits Me Like A Suit" over it. By far my favorite black and white glitter in the world, just by the way. My pinky was two easy coats of "Librarian's Shush" by Femme Fatale Cosmetics. I added this because it softened the other nails a bit and she used to work as a library assistant so I knew she'd appreciate the name! Now on to the actual nail art.


For my pointer finger, I did a sort of gunmetal color base ("Carbonite" from Revlon) with some simulated blood spatter. The blobs were applied using a dotting tool that I bought from Winstonia Store. As with my thumb, this red is "Over & Over A-Gwen" from OPI.


For my middle finger, I decided to do a simple N7 design. I was really excited about this one since it was the most detailed thing I could really do with the thickness of brushes that I have. There are a ton of different designs used for the N7 logo, but I went off the one on my hoodie sleeve. The base was (again!) OPI "Over & Over A-Gwen." After the base and the top coat that I put over it dried, I used Scotch tape to paint all but a thin stripe black using "Camelot" from A England. After that dried, I used a striping brush to add the white lines with OPI "Alpine Snow." The N7 logo itself was also freehanded using a brush and "Alpine Snow."


For my ring finger, I decided to do a single galaxy nail. The base for this was "Camelot" from A England and top coat. After that dried, I sponged on a mixture of "Downtown" by Revlon, "Perle" by Dior, "50/50" by ORLY, "Lady of the Lake" by A England, and "Tess d'Urbervilles" by A England. After those all dried, I added small "stars" using "Carbonite" by Revlon. When that dried, it was time for a top coat and it was all done!


I've had better galaxy nails (I clearly need to practice them more often!), but overall I was really happy with these! I actually did this design on both nails and wore them to a friend's bridal shower and got quite a few compliments. Do any of you have any different techniques or colors you like to add in galaxy nails?

Wednesday, May 14, 2014

Family Appreciation Nail Art #1 - Baseball!

It has become exceedingly apparent to me in the past few months that I'm very lucky to have such a supportive family. I have a hobby that many consider frivolous and borderline strange, but my whole family is so supportive and excited about my nail art. Realizing this, I've decided to do nail art that reminds me of each one of them so that they know how much I appreciate their support and understanding.

I decided to pick my little sister, Emily, for the first spotlight. We've been at odds many times throughout our lives, but she still sticks up for me when people don't understand my obsession with polish. She compliments every mani I do. She likes everything I do on Instagram. She is an all-around cheerleader for my nail art, even though she herself doesn't really understand the interest. One of the main reasons that she is so supportive is that she knows what it's liked to get judged for an obsession, hers being sports. She has always loved them, and her love for them is infectious! And so, in her honor, I made some baseball nails to show you all. I used all nail polish for this, so I'll go through each nail to break down what I did! (All nails are using Jior Couture "Smooth Me" ridge filling base coat and "Cover Me" fast dry & seal top coat.)


On my thumb, I simply had a base of Butter London "Dosh" with a messily applied streaking of OPI "Skip the Gift Wrap." I used a fan brush to give it a sort of grass feel. Mind you, no self-respecting baseball field caretaker would allow their grass to look that ragged and unkempt!


For my pointer finger, I used a base of Butter London "Cuppa" and painted on rough lines with OPI "A-Taupe the Space Needle" (which was very fitting, considering the Seattle theme). After that dried a little, I sponged more "Cuppa" on top of it to give it a very battered, wooden feel. This nail, quite obviously, represents the bats! No batting gloves here!


Since I was born (and mostly raised) in the greater Seattle area, I went with Mariners' colors (teal and navy) on my middle finger. I used Pure Nail Lacquer "Overflow" for the base and did a chevron tip with OPI "Yoga-ta Get This Blue!" using nail vinyls from @teismom on Instagram.


For my ring finger, I attempted to create a zoomed-in baseball look. I used OPI "Alpine Snow" for the base and free-handed the stitches using Deborah Lippmann "Footloose."


For my pinky finger, I simply used Mineral Fusion "Galaxy" by itself since it had small navy hexes and larger green ones, it worked perfectly for this!


Do any of you guys have a baseball addiction? I'd love to hear stories! And thanks again for reading!

Thursday, May 8, 2014

Introduction!

I wanted to begin this first post with a little introduction about where I'm coming from as a nail artist and a human being. Ever since I was little, I loved nail polish. I've had pretty severe anxiety problems from a young age, so I bit my nails ever since I could remember until a coupe years ago. My little sister convinced me to get an Instagram (she's much more hip than I am) and I instantly fell in love with the nail community. I had never seen nail art before and was astounded at the things that some of the artists could do. On top of rekindling my lifelong love for varnish, it made me realize how unhealthy my nail biting habit was and how much I wanted gorgeous, long nails! I worked long and hard to have strong, healthy nails that I'm happy with. While they do still break on occasion (thanks a lot, retail work), I know that they're a jillion times better off than they were prior to joining this community. With all of the support and kind words from other nail artists and family, I've decided to become a little more dedicated to my passion of nail art. I've spent my life in love with art and polish, so it only makes sense for me to combine the two and try to share it.

As some of you may know, I started a blog about a year ago to record the steps I was taking to get better nail health. I ended up making very few posts for it since I wasn't happy with how my nails looked (hence the point of the blog) and didn't often take pictures of my manicures. Recently, however, I've been feeling like I'm creating manis that I love and never get a chance to post on Instagram! While this is a very exciting realization since it means my nail heath has improved greatly, I was rather bummed about not being able to share all of the manis I make. With this realization, I've decided to once again delve into the world of nail blogging, only with much more regularity and depth this time around.

I hope you enjoy!
Allison (@whimsicalicious)